


The moment a tree comes down, the garden feels different—lighter, perhaps, but also a little empty. That bare space isn’t a loss; it’s a blank canvas waiting for something new to take root.
With the right planting choices, it can become the most captivating corner of your outdoor space.
Assessing and Preparing the Site with Care
Every thriving replanting project begins with an honest look at the ground you have to work with.
After tree removal, the soil can be compacted and littered with roots or woody debris that quietly sap nutrients from whatever you plant next. If left in place, these remnants can slow growth and weaken young plants before they have a chance to settle.
Start by clearing large roots using a sturdy spade or digging fork, working methodically to loosen compacted areas. It’s labour-intensive work, much like preparing a canvas before painting, but it ensures your next planting won’t be held back.
Once the ground is free from obstructions, pause to observe its exposure, airflow, and its relationship to the rest of the garden.
This thoughtful inspection helps you picture how your chosen plants will mature and how they will shape the space over time.
Choosing Plants That Belong
Plant choice is the moment when practicality meets creativity. Selecting species that suit your garden’s light levels and soil type saves years of frustration later.
For instance, a sunny corner welcomes flowering fruit trees or roses, while a cooler, shaded spot could become a lush haven of ferns and woodland natives.
Pay close attention to soil conditions as well. Clay soils call for plants that can tolerate moisture retention, while sandy soils call for drought-resistant varieties.
Adding native plants not only boosts resilience but also supports biodiversity by providing food and shelter for local insects and birds.
Think ahead about mature size, shape, and spread. The most beautiful planting can lose its appeal if it grows too large for its space or overshadows nearby beds.
Local nurseries can be invaluable, offering advice rooted in the realities of your climate and soil. This is also the time to consider seasonal variety. Plants that offer interest in different months create a garden that feels alive year-round.
Once you’ve got the right plants in mind, the next step is to prepare the soil so they have the best possible start.
Building Healthy Soil from the Ground Up
Soil is the quiet foundation of every thriving garden, influencing plant health more than many realise.
It doesn’t simply hold roots in place; it regulates moisture, stores nutrients, and supports a whole community of microorganisms that keep plants strong.
Start by collecting small samples from several points in your planting area and testing pH, texture, and nutrient content. This knowledge tells you whether to raise or lower acidity, adjust structure, or address specific deficiencies.
For example, alkaline soils may need organic matter like leaf mould to lower pH, while acidic soils can benefit from lime to achieve balance.
Before adding anything new, remove any large stones, woody remnants, and compacted clumps. Loosen the ground thoroughly so air and water can move freely.
Once cleared, work in generous amounts of well-rotted compost or aged manure to improve structure, drainage, and fertility. This organic matter also encourages earthworms and beneficial microbes, creating a living soil ecosystem.
If deficiencies remain, incorporate a slow-release fertiliser to provide steady nutrition over time, avoiding the surge-and-drop effect of fast-acting feeds.
For particularly sandy soils, adding biochar or coir can help lock in moisture, while clay-heavy soils benefit from grit to improve drainage.
Not only does a well-prepared bed benefit plants, but it also drains evenly, is easier to maintain, and needs less attention throughout the seasons.
Having created the right environment beneath the surface, you can plant, knowing the roots will grow strong from the very start.
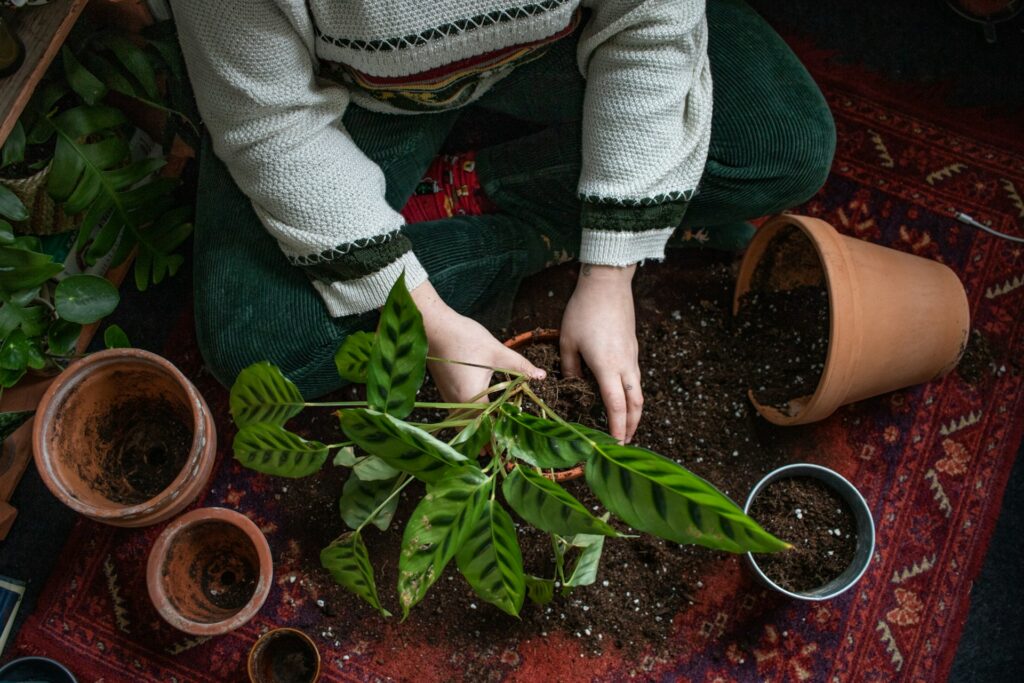
Planting with Precision and Purpose
Planting looks straightforward, yet a few small details can make the difference between a plant that survives and one that thrives.
Begin by digging a hole roughly twice as wide as the root ball and no deeper than its height. This allows roots to spread naturally without being buried too deep, which can cause rot.
If the roots are densely packed or circling, gently tease them apart to encourage outward growth. Backfill with the soil you’ve prepared, firming it lightly to remove air pockets without compacting the structure.
Spacing is just as important as depth. So, place each plant according to its eventual spread, resisting the urge to close gaps for instant coverage.
Adequate spacing ensures every plant has enough light, water, and nutrients as it matures, preventing weak or spindly growth later.
Once positioned, water deeply to settle the soil and connect roots to their new environment. This thorough soak helps plants adapt quickly and withstand seasonal challenges, from hot summer spells to cold winter frosts.
For young trees or taller shrubs, staking can be worthwhile in exposed areas to prevent wind rock until roots are fully anchored.
With the planting complete, your focus shifts to protecting these new additions so they establish strong roots and flourish in the months ahead.
Protecting with Mulch and Consistent Watering
Mulching is the quiet guardian of healthy plantings.
Spread a 5–10 centimetre layer of organic mulch such as bark, straw, or composted leaves around the base, leaving a gap near stems to prevent rot.
That way, it conserves moisture, suppresses weeds, and maintains an even soil temperature.
After mulching, establish a watering routine tailored to your soil type and the season.
Deep watering once or twice a week encourages roots to grow deeper, making plants more drought-resistant. During hot spells, monitor closely, and in prolonged wet weather, reduce watering to avoid saturation.
To check moisture levels, insert a trowel into the soil to a depth of about 15 centimetres. If it feels dry at this level, water is due.
This mindful approach conserves resources while promoting strong, healthy growth.
Supporting Long-Term Growth Through Maintenance
Even after planting is complete, the work of nurturing your garden is far from over. Consistent observation allows you to spot changes early, whether it’s leaf discolouration, unusual wilting, or signs of pest activity.
Equally important is weed control, as weeds compete for the same nutrients and water your plants depend on. While mulch is an effective barrier, occasional hand weeding ensures the area stays pristine.
To maintain vigour, feed in spring with a balanced fertiliser and refresh mulch annually to preserve its protective benefits. In addition, regular checks for nutrient deficiencies or soil compaction enable you to address issues before they take hold, keeping plants in peak condition.
Careful tree pruning, when carried out at the right time of year, maintains shape and improves airflow and removes diseased or damaged wood before problems spread.
This careful attention channels energy into healthy growth, making plants stronger and more productive.
Where young or vulnerable plants are concerned, installing simple supports or protective netting can prevent damage from strong winds or wildlife.
Conclusion
Congratulations on starting a project that blends creativity with lasting value!
You’ve turned a gap in your garden into an opportunity for beauty and renewal. May the area you’ve created see growth, colour, and fulfilment with each season.